

1. Introduction
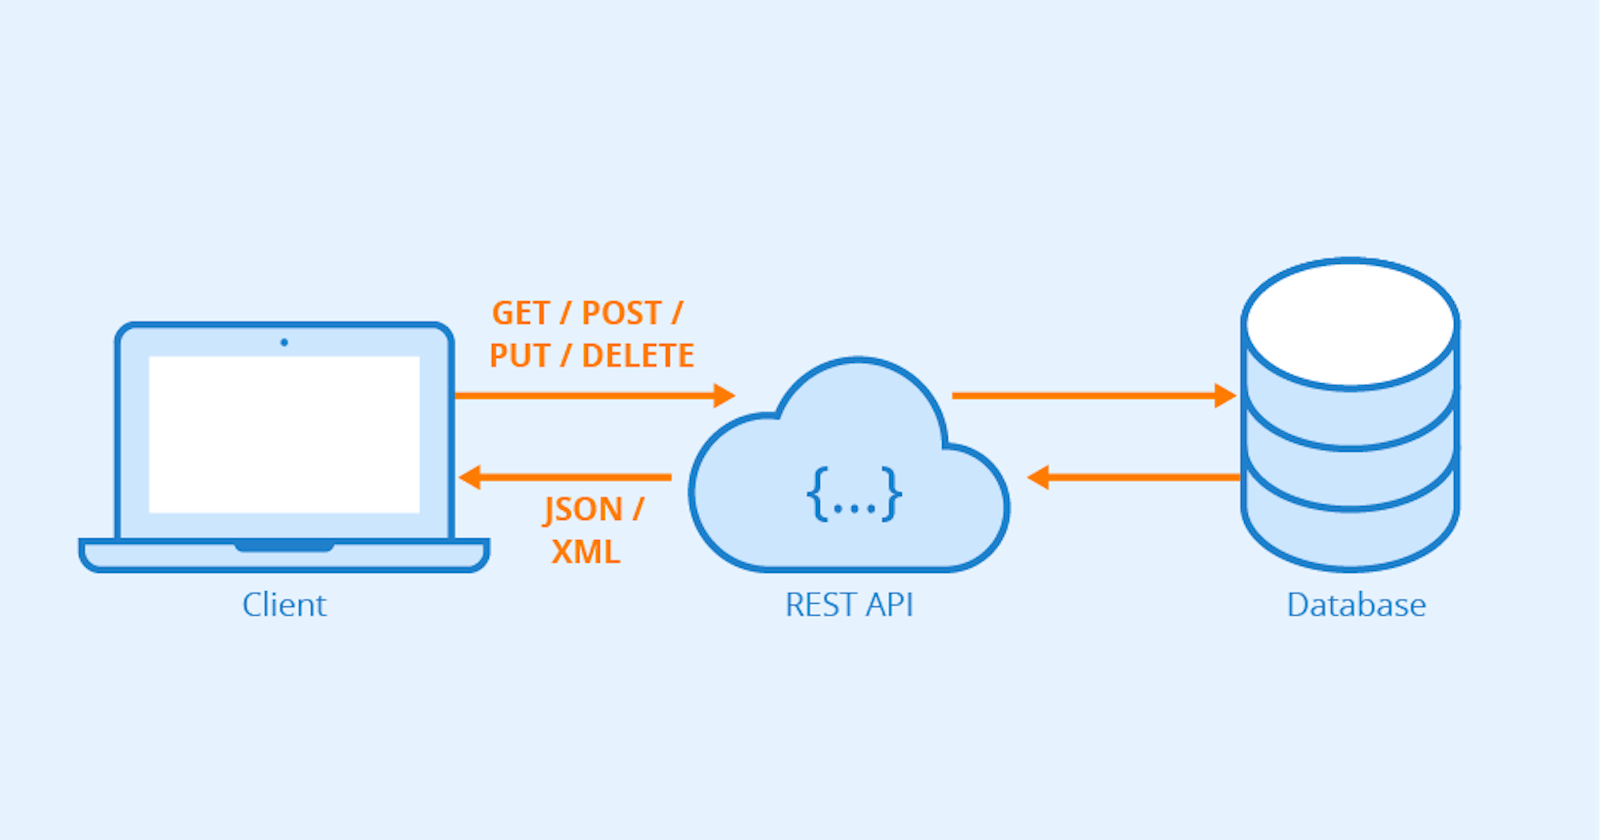
What is the REST API ?
A RESTful API is an architectural style for an application program interface (API) that uses HTTP requests to access and use data. That data can be used to GET, PUT, POST and DELETE data types, which refers to the reading, updating, creating and deleting of operations concerning resources.
2. Integrate your project.
Clone repo
git clone https://github.com/RavinduSathsara/Node.js---RESTful-API.gitNow navigate to the repo
cd .\Node.js---RESTful-API\Then you need to run the below command to install the required dependencies.
npm install
Congrats!. you successfully Integrated your project.

3. Let's start building the project
Step 1 :- import all required things in index.js file.
const Joi = require('joi');
const express = require('express');
const app = express();
Step 2 :- Create a sample array.
In this example, we don't use a Database. so we understand with a simple javascript array.
const students = [
  { id: 1, name: 'John Wick' },
  { id: 2, name: 'Walter White' },
  { id: 3, name: 'Tommy Shelby' },
];
Step 3 :- add below the line for parse incoming JSON requests and puts the parsed data in
req.body.
app.use(express.json());
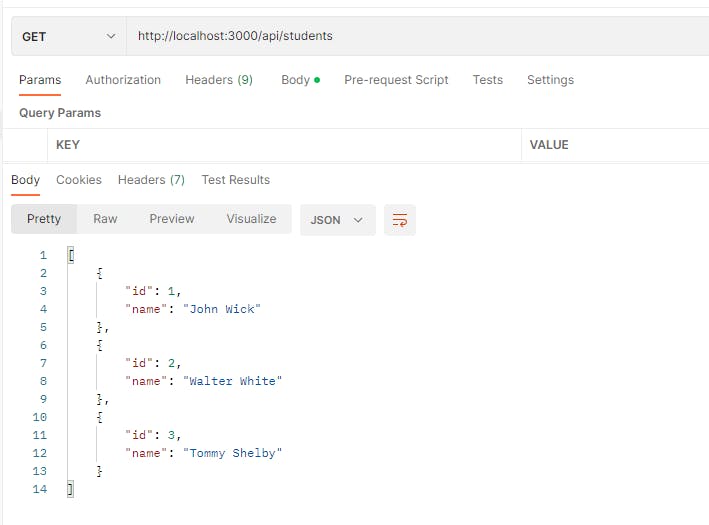
Step 4 :- Get all the students.
app.get("/api/students", (req, res) => {
  res.send(students);
});
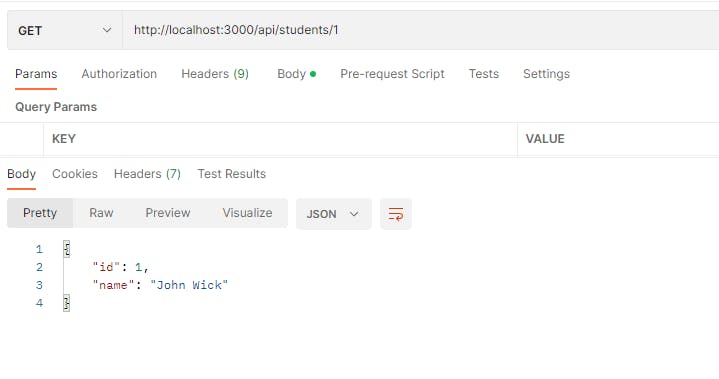
Step 5 :- Get a single student.
app.get("/api/students/:id", (req, res) => {
  const student = students.find((c) => c.id === parseInt(req.params.id));
  if (!student)
    return res.status(404).send("The student with the given ID was not found.");
  res.send(student);
});
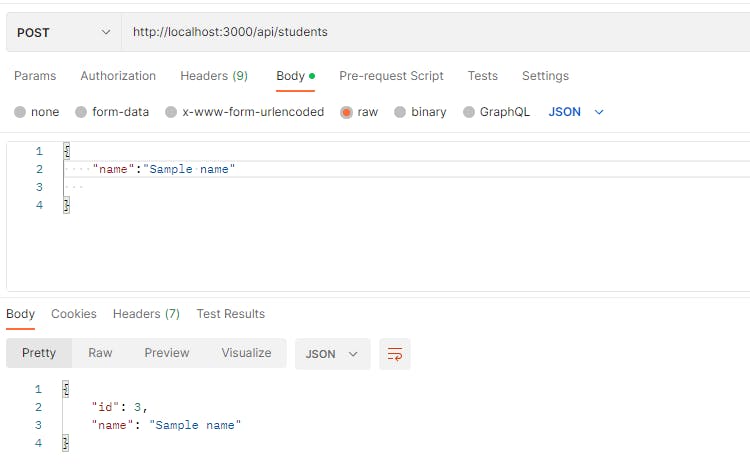
Step 6 :- Add a student.
app.post("/api/students", (req, res) => {
  const { error } = validateStudent(req.body);
  if (error) return res.status(400).send(error.details[0].message);

  const student = {
    id: students.length + 1,
    name: req.body.name,
  };
  students.push(student);
  res.send(student);
});
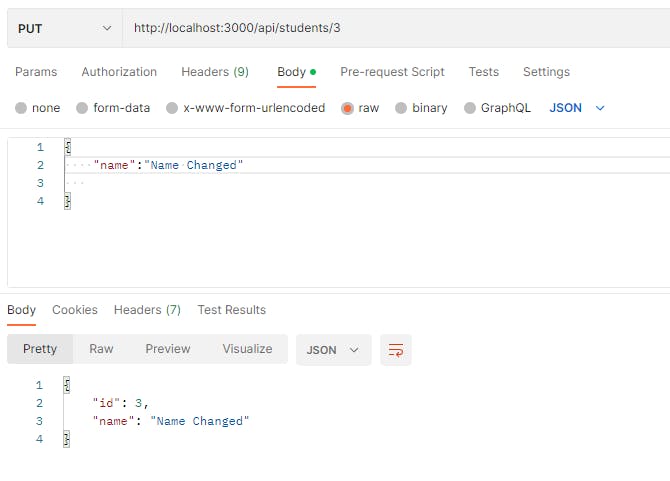
Step 7 :- Updating a student.
app.put("/api/students/:id", (req, res) => {
  const student = students.find((c) => c.id === parseInt(req.params.id));
  if (!student)
    return res.status(404).send("The student with the given ID was not found.");

  const { error } = validateStudent(req.body);
  if (error) return res.status(400).send(error.details[0].message);

  student.name = req.body.name;
  res.send(student);
});
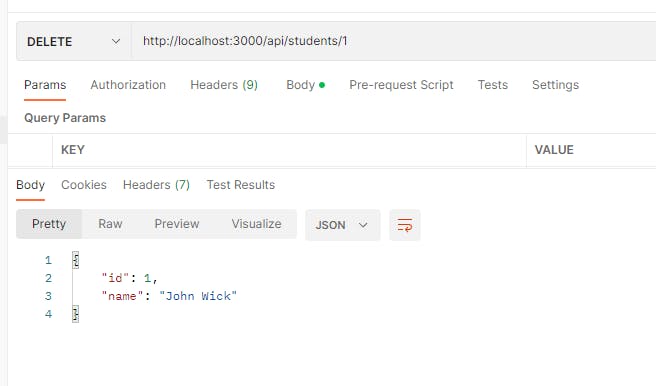
Step 8 :- Deleting a student.
app.delete("/api/students/:id", (req, res) => {
  const student = students.find((c) => c.id === parseInt(req.params.id));
  if (!student)
    return res.status(404).send("The student with the given ID was not found.");

  const index = students.indexOf(student);
  students.splice(index, 1);

  res.send(student);
});
Step 9 :- Add validation function for student
You should never trust data sent by the client. Always validate! Use the Joi package to perform input validation.
function validateStudent(student) {
  const schema = {
    name: Joi.string().min(3).required(),
  };

  return Joi.validate(student, schema);
}
Step 9 :- Reading the port from an environment variable or 3000 for listening.
const port = process.env.PORT || 3000;
app.listen(port, () => console.log(`Listening on port ${port}...`));
Step 10 :- To run the project run the below cmd in your cmd.
npm run start
Great ! Then you can test your app. As an example, I give the below.
Overall, this article is a valuable resource for anyone interested in learning more about REST API.